Difference between revisions of "Maps/Other"
(→Other Maps: added Toyshop Terror) |
|||
| Line 99: | Line 99: | ||
=== Rainbowland === | === Rainbowland === | ||
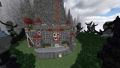
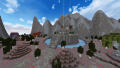
| − | Created by: TheKazbot, Samsterzzzzz, SirSpammo, StormKiller, ComKreaper | + | Created by: TheKazbot, Samsterzzzzz, SirSpammo, StormKiller, and ComKreaper |
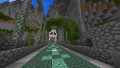
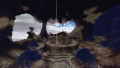
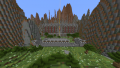
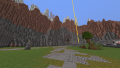
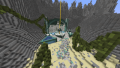
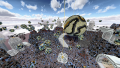
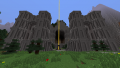
[[File:Rainbowland.png|thumb|right|Monster spawn and the front wall of Rainbowland.]] | [[File:Rainbowland.png|thumb|right|Monster spawn and the front wall of Rainbowland.]] | ||
| Line 155: | Line 155: | ||
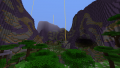
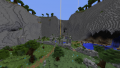
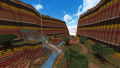
During the Great H'cet War, elven troops would take control of the passage and overtake the forces at Skalamyr. Entire divisions of elven archers, warriors, and artillery would travel through until they were eventually stopped at the Battle of Marlark. In the peace negotiations the dwarves and elves would share a weary ownership over the pass. The dwarves would set up several checkpoints throughout their part to alert of any unusual movement from the elven side. | During the Great H'cet War, elven troops would take control of the passage and overtake the forces at Skalamyr. Entire divisions of elven archers, warriors, and artillery would travel through until they were eventually stopped at the Battle of Marlark. In the peace negotiations the dwarves and elves would share a weary ownership over the pass. The dwarves would set up several checkpoints throughout their part to alert of any unusual movement from the elven side. | ||
In recent times, Lady Lorelei and her royal guard including Salogel Sureshot took the pass as a show of good faith in their diplomatic mission through heavily defended territory. Little did the dwarves know that they would have to use those defenses to fight side by side with elven nobles against their brethren that had fallen so long ago. | In recent times, Lady Lorelei and her royal guard including Salogel Sureshot took the pass as a show of good faith in their diplomatic mission through heavily defended territory. Little did the dwarves know that they would have to use those defenses to fight side by side with elven nobles against their brethren that had fallen so long ago. | ||
| + | }} | ||
| + | <br clear=all> | ||
| + | |||
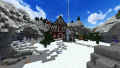
| + | === Toyshop Terror === | ||
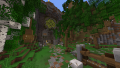
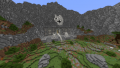
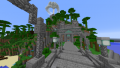
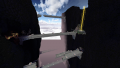
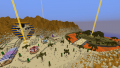
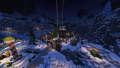
| + | Created by: nightowl950, Bcats2, jloevur, hariesh, Meekaachuuu, and Demi_Fiend_ | ||
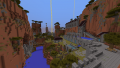
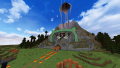
| + | [[File:Toyshop terror.png|thumb|right|Tinseltown and its clocktower and first shrine.]] | ||
| + | |||
| + | {{Maplore|In the far north, past Frost Hold Canyon and Tinkertown, there is a small settlement full of cheery Christmas dwarves. These dwarves spent all if their time celebrating Christmas and making toys and shrines for all the good dwarves in the land. | ||
| + | One day however, a dwarf went out into the forest to decorate a tree with tinsel and ornaments. This tree however wasn't as idle as the rest of those surrounding it. This tree did not want to be decorated and went on a rampage! He knocked down trees and made his way toward Tinseltown. The dwarves, seeing this threat, sent out messengers on their quickest reindeer to other dwarven keeps to ask for aid in their fight against the tree. Little did those dwarves know, the tree held a secret surprise. The tree was approached by a horde of monsters who had sensed the shrines the Christmas dwarves were making and wanted to wield their power. So the dwarves barricaded their walls and fortified their shrines to prepare for the oncoming horde. | ||
}} | }} | ||
<br clear=all> | <br clear=all> | ||
Revision as of 03:23, 12 December 2020
There are several maps that can be played on for DvZ. Every map is very different but all strive for the same kind of “not too big” style that was common before the most recent "loadouts" version of DvZ. Every map has all the resources necessary to operate in some form or another and have at least one shrine, but most maps have at least two. Each of these sections will just be a little story write-up.
Maps are divided into two categories: Primary and Other. Primary maps are those which are played more often, whether it be automatically queued or regularly played. Other maps are those which are irregular in their game style, are played much less often, and are typically relegated to the weekend event map vote.
Accretion Ridge
Alchemy Bay
Ancient Grove
The Archives
The Bellows
Belly of the Beast
Bryce Monastery
Daragor
Deadwood Spires
The Dirge
Dogekac
Dragonbone Fields
Eryn Envala
Forgotten Asylum
Forgotten Mines
Friendship Town IV
Frost Hold Canyon
Geyser Rock
Glitterhelm Caverns
Golestandt's Den
Grapevine Vale

Great H'cet War
Hazel Peaks
Hergesnerv
Hidden Valley
Hinterland Frontier
Laimargia's Greed
Nekrosis
Hold of Nolrim
Mt Willy

Plagued Marsh
Plains
Queen's Citadel
Namazu Archipelago
Noatun's Groft
Raenil Sanctuary

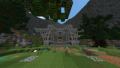
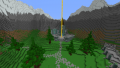
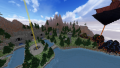
Rainbowland
Redstone Gorge
Rift

Secluded Temple
Satellite Outpost 12E
Scorched Canyon
Shipwreck Shore

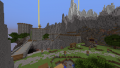
Skalamyrr Citadel
Sophanem
Throntodur
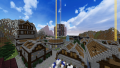
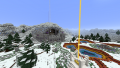
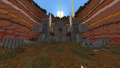
Toyshop Terror
Tree of Eenoln
Trojan Keep
West Delphia
Windy Run River
Winter Workshop


Other Maps
Other maps are those which are played rarely and often do not follow the typical conventions a Dwarves vs Zombies map should follow. These maps are typically only seen in the weekend event map vote or special admin games, and may have balance issues.
Accretion Ridge
Created by: FallDamage312 and Alderdash
The Bellows
Created by: Creator Unknown, Restored by the Gazebo Build Team
The first shrine is a split-shrine, meaning that there are two shrines with a common health pool. Monsters can drain shrine health by standing on either shrine.
Belly of the Beast
Created by: FallDamage312, a_tebboth, and Team Neutral
Bryce Monastery
Created by: FallDamage312 and Alderdash
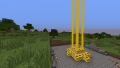
Gnomish Observatory
Created by: psycholizardboy and Leewp

This map has large prebuilt guns that cost drastic amounts of mana to fire and damage monsters.
Golestandt's Den
Created by: MasterMegaGamer and Oldmantoby
Hergesnerv
Created by: a_tebboth and Team Neutral
Monsters do not use the staircase from second to third shrine since their spawn is above third shrine.
The Incinerator
Created by: FallDamage312 and Alderdash

Monsters spawn randomly on multiple pillars surrounding the keep.
Molgan
Created by: Creator Unknown, Rebuilt by pvjm2000, _Genn, and Tonu

The first shrine is a split-shrine, meaning that there are two shrines with a common health pool. Monsters can drain shrine health by standing on either shrine.
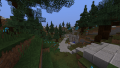
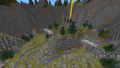
Rainbowland
Created by: TheKazbot, Samsterzzzzz, SirSpammo, StormKiller, and ComKreaper
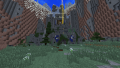
Rift
Created by: Doom_Bringer
First monster spawn has a set of teleporters which send monsters do different bridges adjacent to the main bridge.
Satellite Outpost 12E
Created by: Imanota, with edits by Captain_M654
Both dwarves and monsters are given Jump Boost II at all times on this map.
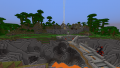
Scorched Canyon
Created by: Doom_Bringer
Shipwreck Shore
Created by: Jarnes, MuffinToaster, and Build Team
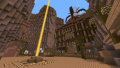
Skalamyrr Citadel
Created by: demolitiondane
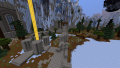
Toyshop Terror
Created by: nightowl950, Bcats2, jloevur, hariesh, Meekaachuuu, and Demi_Fiend_
Tree of Eenoln
Created by: FizZMc
Trojan Keep
Created by: a_tebboth and Team Neutral
Winter Workshop
Created by: Gina and LOM Community